
How to Connect to a Remote Desktop Using a VPN: Step-by-Step Guide
Learn how to connect to your remote desktop securely using a VPN. Follow our simple steps to get started with flexidesktop today!
Explore Windows 10/11 virtual desktops
Real-World Applications of flexidesktop
Setting up an administrator account in Windows is a simple process, and it can be done in two ways:
Below, we’ll guide you through both methods with easy-to-follow instructions.
Right-click on the Windows logo in the bottom-left corner of your screen and select Computer Management.
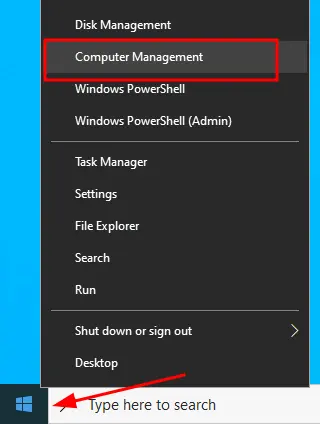
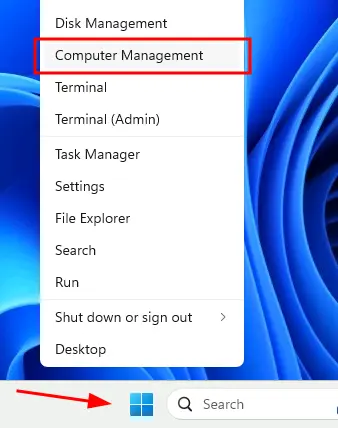
In the Computer Management window:
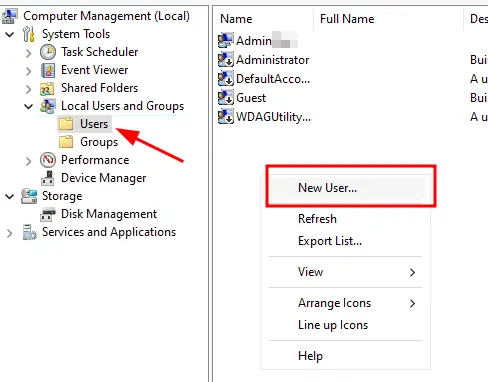
A pop-up window will appear. Enter the following details:
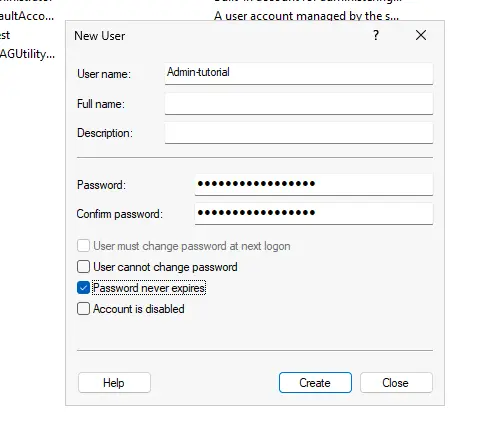
You’ll see options for the user, such as:
For simplicity, select only Password never expires and hit Create.
By default, this creates a standard user account. To grant administrative privileges:
administrators, and click OK.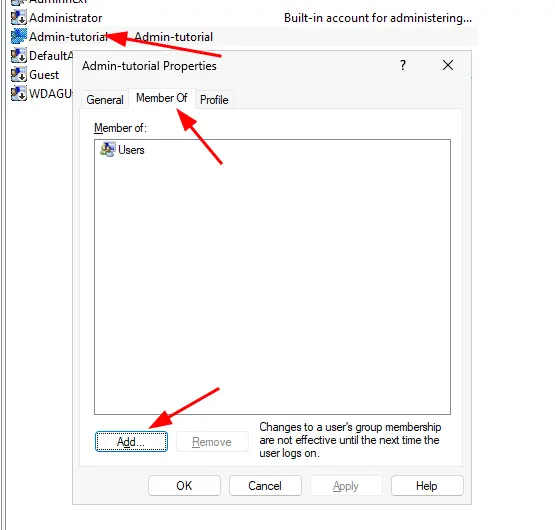
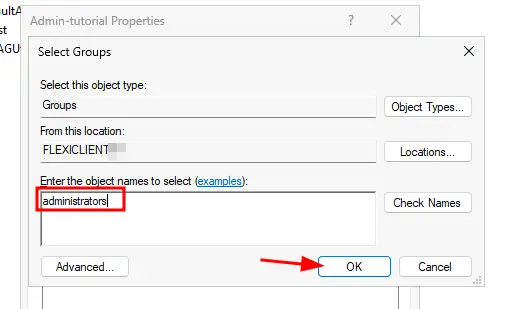
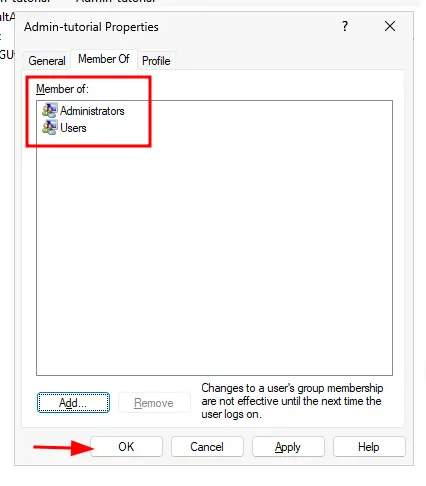
Confirm the changes, and your new administrator account is ready to use!
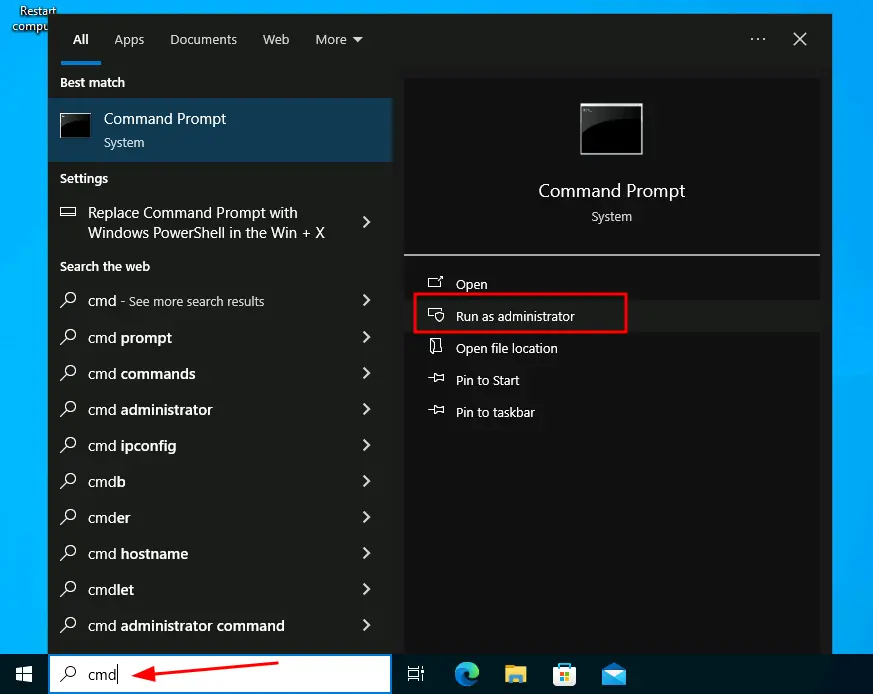
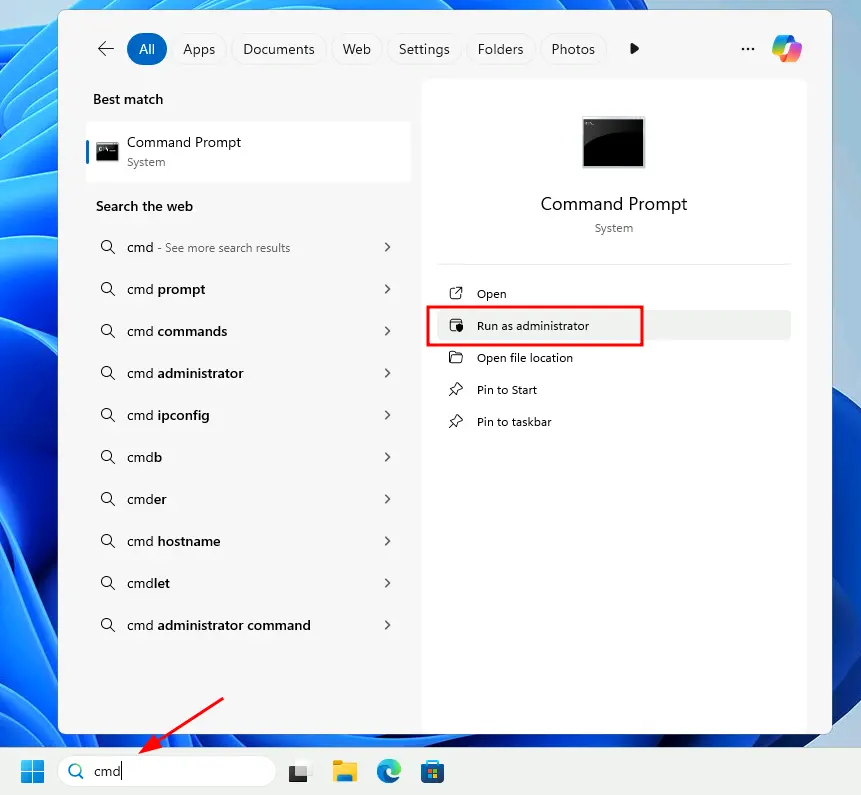
When prompted, confirm by clicking Yes.
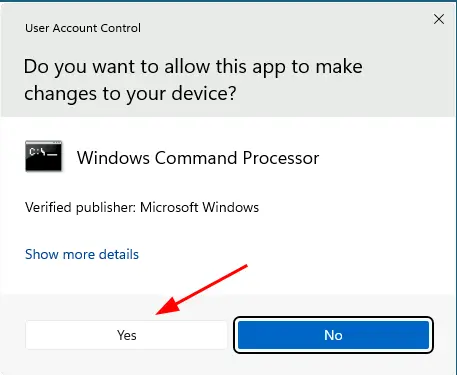
In the command prompt window, type the following command and press Enter:
net user username password /add
Important: Replace "username" with the name of the user you want to create. In our previous example, we used admin-tutorial. Replace "password" with a strong password. Remember, it must include:
For example, in our case, we’ll use the following command:
net user admin-tutorial VerySecurePassword@1 /add
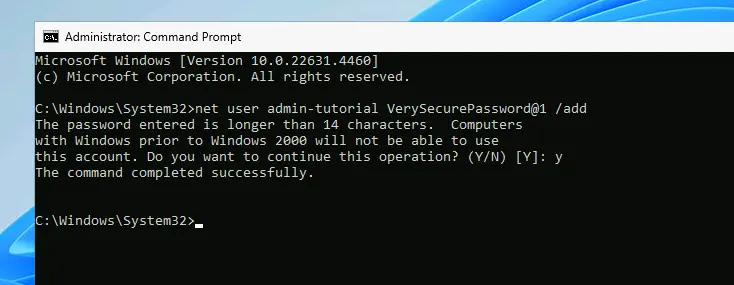
If you use a password longer than 14 characters, you might see a warning. You can safely ignore this warning as it applies to older, unsupported operating systems.
Once the user is created, add them to the Administrators group by typing:
net localgroup administrators username /add
Where "username" is the name of the user you created. In our case, the command would be:
net localgroup administrators admin-tutorial /add

And that’s it! Your new administrator account is ready to use.
Why Choose flexidesktop?
If you’re here learning how to create an administrator account in Windows, imagine simplifying this process entirely with flexidesktop. With our ready-to-use virtual desktops, you gain:
Managing and configuring your systems manually can be time-consuming. With flexidesktop, you save valuable time and resources while gaining a secure, scalable, and efficient desktop solution.

Learn how to connect to your remote desktop securely using a VPN. Follow our simple steps to get started with flexidesktop today!

